A Mesh Wi-Fi Node is the perfect solution to extend your modem’s signal throughout your home, for wall-to-wall Wi-Fi coverage. The Mesh Wi-Fi Node is specifically engineered to extend your Hughesnet Wi-Fi signal for seamless browsing and streaming in every room.
The Mesh Wi-Fi Node pairs seamlessly with the Hughesnet Wi-Fi Modem. Follow the Steps below to setup the Mesh Wi-Fi Node. The video below will also help you with activating the Mesh Wi-Fi Node.
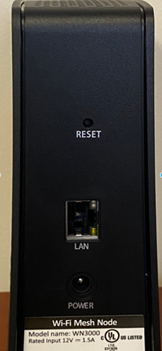
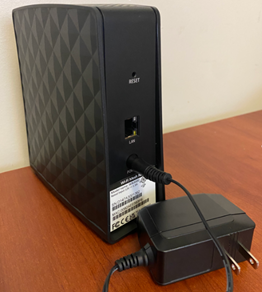
Step 1: Identifying Ports.
- Take a moment to identify these ports on your device. On the back of the Mesh Wi-Fi Node, you will find the LAN port and Power Connector.
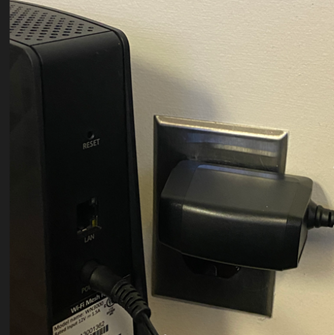
Step 2: Plugging in the Mesh Wi-Fi Node.
- Once you have identified the ports, plug in your Mesh Wi-Fi Node to a power outlet using the provided power AC cable.
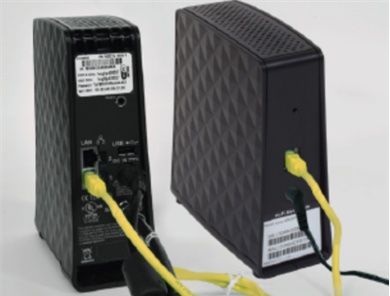
Step 3: Connecting Mesh Wi-Fi Node to Your Modem.
- Using the provided ethernet cable, insert one end of the cable to the LAN port of the Mesh Wi-Fi Node. Connect the other end of the cable to any of the available LAN ports on the Hughesnet modem.
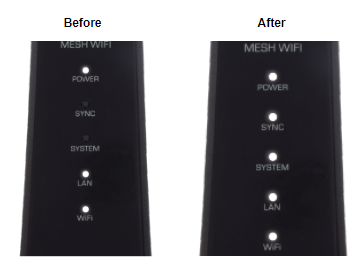
Step 4: Syncing with the Modem
- After connecting the devices, you’ll need to wait for the LAN LED on your Mesh Wi-Fi Node to turn on solid, indicating a stable connection. Watch the SYNC LED on the Mesh Wi-Fi Node, as it will blink for about one minute while syncing with your modem. When the SYNC LED is solid, it means the sync is complete.
Step 5: Unplugging Mesh Wi-Fi Node.
- The next step involves unplugging your Mesh Wi-Fi Node. Disconnect the Yellow LAN cable from the Hughesnet modem and your Mesh Wi-Fi Node. Disconnect the Power AC cable from the wall outlet. Leave the AC plug connected to the Mesh Wi-Fi Node.
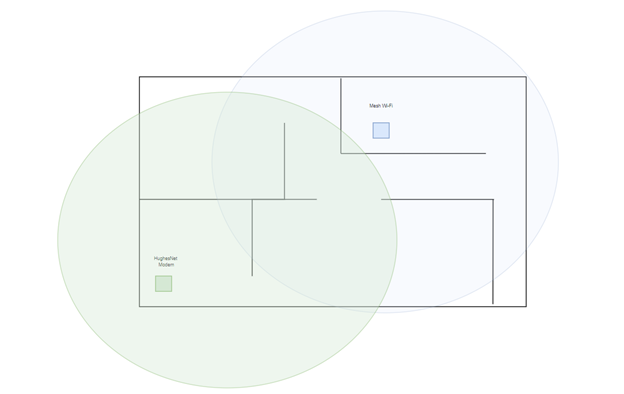
Step 6: Mesh Wi-Fi Node Placement.
- Proper placement of your Mesh Wi-Fi Node is essential for optimal performance. Find a location halfway between your Hughesnet Modem and an area with weak signal. Ensure that your Mesh Wi-Fi Node is in an uncluttered area and allows for proper ventilation. The Mesh Wi-Fi Node should be placed in an upright position.
Step 7: Testing Connection.
Once you’ve found the right spot for your Mesh Wi-Fi Node and placed it correctly, connect the device to a power outlet. Wait for the power lights to turn on and remain solid. After successful placement and connection, the Mesh Wi-Fi Node is now extending the Wi-Fi signal.
Congratulations! You’ve successfully set up your Mesh Wi-Fi Node. Add additional Mesh Wi-Fi Nodes to eliminate dead zones in your home.